So You Think You Can Run? Part 2
Side plank, the run/walk, Buddha Bowls and pickled ginger.
Hello again and welcome back to part 2 of So You Think You Can Run? This running exercise series is focused on preventing some of the most common running injuries. Today we will be focused on the side plank. But before we get into that, there is something important about running that I would like to discuss that will be essential to injury prevention. That is the 10 minute walk warm up as well as the run/walk method.
Always Walk to Warm Up!
After doing the exercises described in this blog series, the next thing that you should do right when you get outside the door is to start with a 10 minute brisk walk to warm up. Do not skip this step! This is probably just as important as all of the exercises we will be going over. Your 10 minute brisk walk before your run is a fantastic way to warm up your muscles and ligaments, as well as to lubricate the joints in your arms, legs and spine. It is also a great way to help prevent any disc injuries from occurring. Just like if you were to go skiing for the first time of the season, you wouldn’t immediately go for a black diamond run, you would most likely start with a green or blue run to warm yourself up and get back into your rhythm. Warm ups are key!
The Run/Walk Method
Once your 10 minute walk warmup is complete, you can start running. But if you are a beginner runner, or an intermediate runner like myself that is getting back into it more heavily, you’ll want to do the run/walk method. For myself, I started out this pandemic by doing a 2 and 1. This means 2 minutes of running, followed by 1 minute of walking (you’ll want a watch or phone to keep time).
The idea is to have the right ratio of running to walking to prevent any pain or injuries from occurring. Tailor the ratio to your specific needs. You might need to start with a 30 second run, followed by a 2 minute walk. That’s okay! Each time you get out to run you will get stronger and better at it. What we want to avoid is injury at all cost. We don’t want to take one step forward only to take two back. Be kind to yourself at the beginning and start slow and gradual. As your body becomes stronger and the muscles adapt to your new exercise then you can start to push yourself and set more intense goals. Start small, and I am sure you’ll surprise yourself with how quickly you can progress. Also, by doing the run/walk method it will enable you to do the activity for much longer than just trying to run the whole time.
With the 10 minute walk warm up and the run/walk method explained, we will turn our attention back to todays subject of the side plank. This exercise is important for lateral stabilization of the core muscle group. Without lateral stabilization we run the risk (Ha! Run the risk. No pun intended) of creating low back pain and knee pain.
How to Side Plank
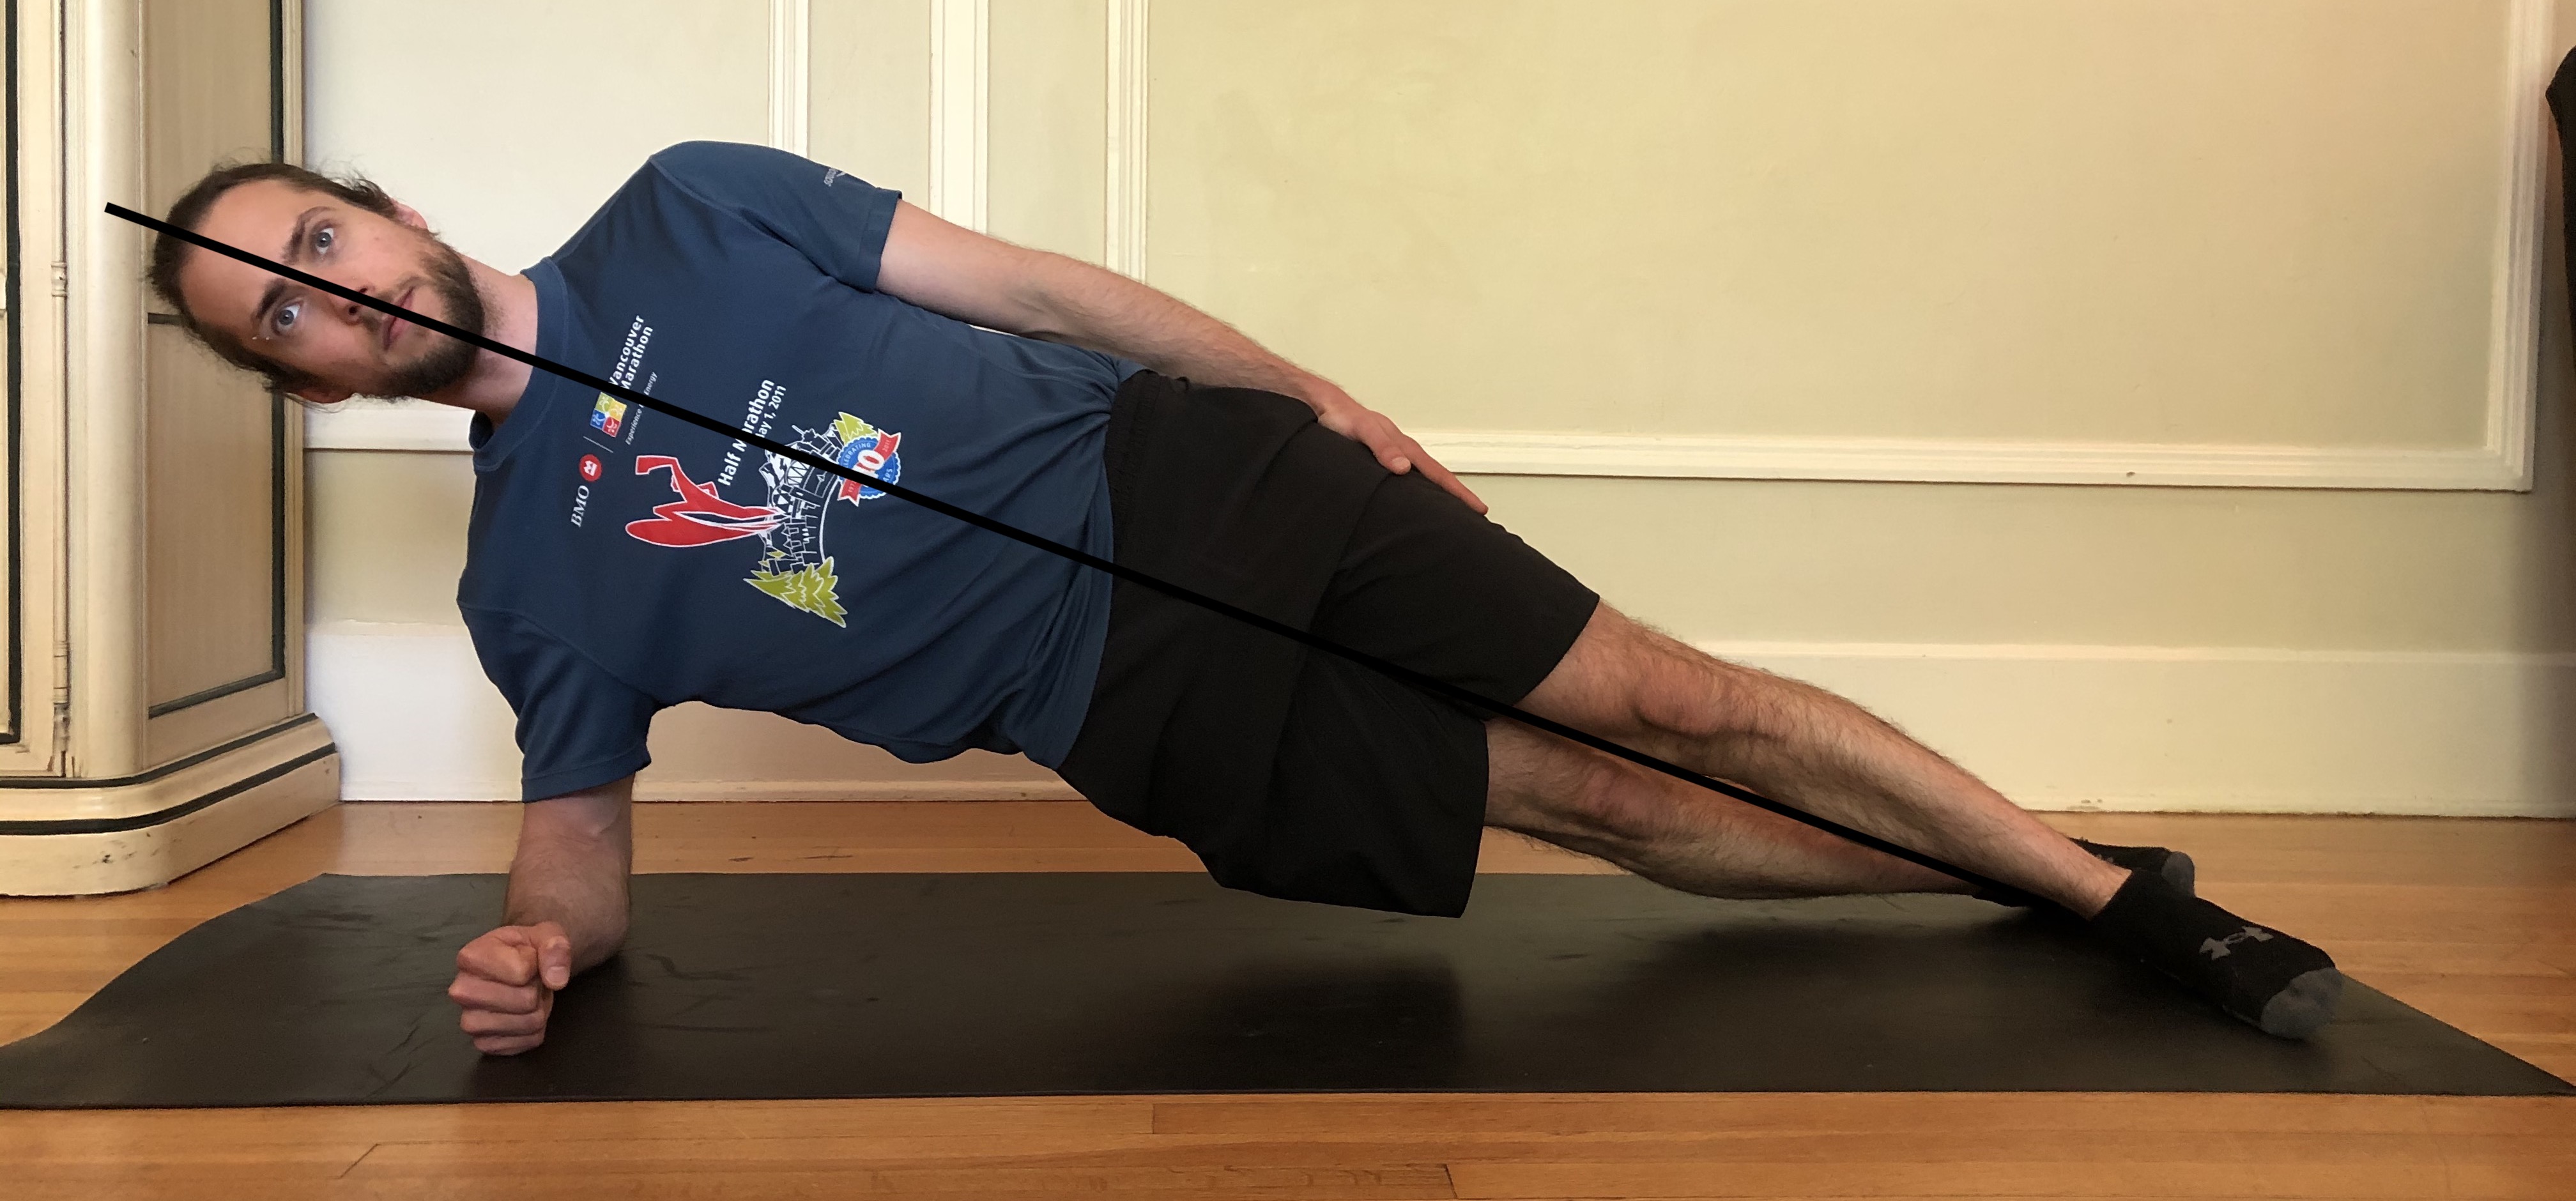
To start this exercise lie on your right side, legs extended, with your left foot in front of your right. Prop yourself up with your right arm underneath you with your elbow directly underneath your shoulder joint. Your forearm will be flat on the ground pointing in the same direction you are looking.

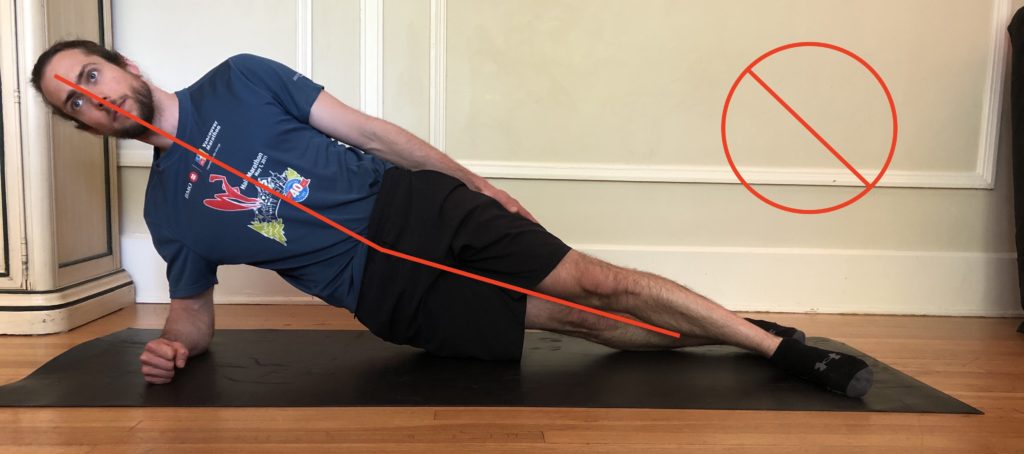
To initiate the side plank push your hips up and forward. Don’t bring your hips up too high, think about keeping your spine straight (as mentioned in the previous blog doing this in front of a mirror would be very helpful). Keep your right shoulder engaged by pushing it down into the floor. Push the outside of your right foot into the floor as well to help engage the gluts and lateral stabilizers of the leg. Keep in mind the position if your head as well, it should be in line with the rest of the spine. Once you have fatigued your right side, turn over and start again on your left.


If you find the full side plank too difficult or hard on the shoulders, you can try side plank from your knees. Instead of lying on your side with you legs extended, start with your legs bent at the knee at about a 90 degree angle. Pop up into the side plank just like mentioned above, but this time you’ll be putting pressure through the side of your right knee instead of your foot.


I would recommend the same FIDs as previously mentioned with the plank in part 1 of this blog series. I do 20 seconds of side plank, followed by 10 seconds of rest, until my form starts to deteriorate or until I start to shake. But once again tailor it to your strengths and needs. If you can only do 5 seconds of activation and 10 seconds rest that is okay. We want you to build strength slowly and safely and prevent injury from occurring. Above all else perfect your form.
Something fun to try in the kitchen!
Well, before I let you go I just want to pass on a couple recipes that I have tried out recently due to the COVID-19 social isolation situation. Also I should include this as a disclaimer, I am not a nutritionist! As a Registered Massage Therapist it is not within my scope of practice to give out nutritional advice. These recipes below are intended for fun and for something new to try.
Now that that’s out of the way, this Kale and Quinoa Salad Bowl with Curry Coconut Dressing is amazing. My girlfriend and I have had this quite frequently for our lunches. I do make some changes to the recipe though on behalf of my girlfriend’s allergies. We substitute coconut milk for almond milk, peanut butter with almond butter, soy sauce for gluten free soy sauce, and peanuts with cashews or walnuts. Still tastes amazing.
I was also trying to find ways to change up the bowls by adding fruits such as pomegranate or mango, and even making homemade Crispy Falafels. But the one thing I have enjoyed the most is pickling ginger. Here is a video with a great tutorial on how to pickle your own home made ginger!
The hardest part is waiting the week before you get to eat them! I have pickled some red onions but I wasn’t too happy with the outcome. If I find a good recipe for that I will let you know. I will also be trying my hand at pickling shredded carrots soon.
Well that feels like enough writing for now. If you have any questions in regards to the side plank, or the run/walk method please feel free to email me at clayton@yourwellnessatwork.ca.
Thank you again for reading and have a safe quarantine!
Best in health,
Clayton Giles, RMT
Your Wellness at Work